

If you're considering using your Bissell carpet cleaner on tile floors, it's important to first determine if your specific model is suitable for hard surfaces. You'll want to guarantee you have the right cleaning solution and techniques to avoid damage. After preparing the area, you'll need to adopt a methodical approach for the best results. But before you start, there are key safety tips and effective cleaning procedures that can make a significant difference in your experience and outcome. Understanding these will set you on the right path to achieving clean, gleaming tiles.
Determining Suitability of Your Cleaner

When it comes to guaranteeing the effectiveness and safety of your cleaning routine, understanding the suitability of your Bissell carpet cleaner for tile floors is essential. You wouldn't wear flip-flops to a snowstorm, so why would you use the wrong cleaner on your tiles?
Start by checking your carpet cleaner's manual; Bissell clearly outlines which surfaces each model can tackle. If you've got a multi-surface model like the Bissell CrossWave, you're in luck—this beauty can handle tile without breaking a sweat.
However, not all models are created equal. Some may require special attachments, like the bare floor tool on the Bissell ProHeat 2X Revolution Pet Pro. If your cleaner's primarily for carpets, it might just turn your tiles into a slippery slide—yikes!
And let's not even get started on cleaning solutions. Stick to tile-specific products to avoid turning your tiles into a sticky disaster.
Preparing Your Tile Floors
Before diving into the cleaning process, it's crucial to prepare your tile floors properly to guarantee the best results.
First, clear the area by removing all furniture and rugs—don't worry, they'll forgive you!
Next, grab your broom or vacuum and sweep away any dust and loose debris. Trust me, your cleaner will thank you later.
If you've got stubborn stains, now's the time to pre-treat them with a suitable cleaning product. A little extra love can go a long way!
Also, make sure you're using cleaning solutions specifically designed for tile floors—your tiles deserve the best!
Now, let's set up your Bissell.
Fill the water tank with warm water and add the recommended cleaning solution.
Double-check that you've set your cleaner to the hard floor mode.
Oh, and if your model has a drying function, use it—nobody likes water spots!
Ensuring Safety Before Cleaning

Before you start cleaning, it's essential to verify your tile surfaces are compatible with the Bissell cleaner.
Prepare your floors by testing a small, inconspicuous area and pre-treat any tough stains for the best results.
Taking these precautions will help you maintain your tiles and achieve a thorough clean without damaging your surfaces.
Surface Compatibility Testing
Surface compatibility testing is essential for guaranteeing your tile floors remain unharmed during cleaning. Before you plunge into scrubbing those tiles, check your Bissell manual for recommended surfaces. Trust me, ignoring this could void your warranty faster than your last diet plan!
When it comes to cleaning solutions, make sure you're using one specifically designed for tiles—nobody wants sticky residue ruining their Instagram-worthy floors.
Now, don't just go full throttle on your tiles; test a small, hidden area first. It's like a first date—better to be safe than sorry! Confirm your cleaner is suitable for your tile material, whether ceramic, porcelain, or that fancy natural stone you splurged on. Remember, traditional carpet cleaners aren't your friend here; they can do more harm than good.
If you've got a Bissell model like the CrossWave, you're in luck since it's designed for multi-surface cleaning. But always check the manual for specifics—because every model has its quirks!
Proper Floor Preparation
Proper floor preparation is essential for guaranteeing a safe and effective cleaning process when using a Bissell carpet cleaner on tile floors.
First things first, check your manual! You want to make sure your cleaner is fit for the job—like a superhero, but for dirt.
Next, clear the room of any furniture and rugs. Trust me, your sofa doesn't want to be drenched in cleaning solution—nobody likes a soggy couch!
Once the area's clear, sweep or vacuum up dust and loose debris. This helps prevent scratches and makes sure your cleaner can work its magic without any interference.
Now, pick the right multi-surface cleaning solution suitable for your tiles—no one wants a surprise chemical reaction unless it's in a science lab!
Before diving in, inspect for any stubborn stains. Mark those trouble spots like an adventurer on a treasure map.
Finally, verify you've prepped your Bissell cleaner with the proper settings and attachments.
With all these steps, you're ready to tackle that tile floor like a pro—just remember to keep your dancing shoes off until it's dry!
Stain Pre-treatment Tips
Once your tile floors are prepped and ready, it's time to tackle any pesky stains that could ruin your cleaning efforts.
First, check the type of stain you're dealing with—grease, ink, or food? Knowing the enemy helps you choose the right Bissell cleaning solution. Remember, those fancy harsh chemicals? They're a no-go. Stick to Bissell's multi-surface formulas designed specifically for tile floors.
Now, apply your pre-treatment solution and let it sit for a few minutes. Think of it as giving your stains a timeout. While you wait, grab a soft-bristled brush and gently scrub the area. You're not trying to win a wrestling match; just coax the stain to leave.
Before diving in, don't skip safety precautions. Read the manufacturer's instructions and test a small, hidden area first. Over-saturation can turn your cleaning spree into a slip-and-slide adventure, so avoid that!
Move any furniture or rugs to protect them, and wear gloves and protective eyewear—safety first, right? With these tips, your tile floors will be stain-free and gleaming in no time!
Effective Cleaning Procedure
To achieve the best results when using a Bissell carpet cleaner on tile floors, begin by thoroughly preparing your cleaning area.
First, check your manual—only multi-surface models like the Bissell CrossWave can tango with tile. Once you've verified compatibility, grab Bissell's hard floor cleaning solution and mix it according to the instructions, because nobody wants a tile floor that smells like a chemistry experiment gone wrong.
Before you release your cleaner, sweep or vacuum the floor to kick out debris and dust. It's like a warm-up for your cleaner!
Next, set the cleaner to a low setting to avoid excessive water—your tiles aren't a swimming pool. Clean in sections, so you don't just spread dirt like a kid with finger paint.
After cleaning, rinse thoroughly to avoid sticky residue. Don't forget to dry the floor with a clean towel or mop to prevent slip-and-slide accidents.
Features of Bissell CrossWave

When it comes to versatile cleaning, the Bissell CrossWave stands out with its innovative features that make tackling dirt on various surfaces a breeze. This nifty machine vacuums and washes your floors simultaneously, so you can efficiently conquer messes without doing that awkward dance between two devices.
Its dual-action brush roll rotates at a speedy 3000 RPM, combining microfiber and nylon bristles to grab dirt like a magnet. Plus, you'll love the two-tank technology that keeps your clean and dirty water separate—no one wants to recycle murky water, right?
With a 25-foot cord, you can glide across rooms without constantly hunting for outlets, and at just 11.5 pounds, it's light enough for anyone to handle. The 12-inch cleaning path makes quick work of large areas, while the digital touch panel lets you switch modes with a tap—no more fumbling with buttons like you're trying to decipher a secret code!
Maintenance is a breeze too, thanks to the easy-cleaning features and washable filter. With the Bissell CrossWave, you'll be ready to tackle those tiles and make cleaning feel less like a chore and more like a dance party!
Alternative Cleaning Methods
When cleaning tile floors, effective mop techniques can make a significant difference in maintaining their appearance.
Using a steam cleaner offers added benefits, such as sanitizing surfaces and eliminating stubborn dirt without risk of damage.
Exploring these alternative methods can help you achieve a thorough clean while protecting your tile investment.
Effective Mop Techniques
Mastering effective mop techniques is essential for keeping tile floors spotless and well-maintained. First, clear the area by removing furniture and rugs. It's like giving your floor a fresh start!
Next, sweep or vacuum to get rid of dust and loose debris. If you've got stubborn stains, pre-treat them with a suitable cleaner—think of it as giving your tiles a spa day.
Now, fill your mop bucket with warm water and add the recommended cleaning solution. Start mopping at one end of the room, overlapping your strokes to guarantee no dirty water redeposits itself on your freshly cleaned tiles. Move the mop forward—trust me, your floors will thank you!
If needed, rinse with clean water to whisk away any leftover grime or soap.
Choose a mop with a microfiber head for excellent dirt removal without scratching your tiles. Adjustable handles and built-in reservoirs are game-changers for control and convenience.
Steam Cleaner Benefits
Using a steam cleaner can transform your tile floor maintenance routine, offering numerous benefits that make it a superior alternative to traditional methods.
First off, steam cleaners penetrate deep into grout lines and crevices, banishing dirt and bacteria like a ninja with a mop! You'll appreciate the safety factor too—no more abrasive parts or harsh chemicals grinding away at your tiles.
Efficiency is another key player here. With a steam cleaner, you'll tackle large areas in no time, and they dry just as quickly. Talk about multitasking!
Plus, think of the health benefits; fewer chemicals mean a happier home and a safer space for your family.
Let's not forget the cost-effectiveness. One steam cleaner can work wonders on various surfaces, so you can retire those other cleaning devices to the closet of shame.
Just remember to check compatibility with your tile, handle grout with care, and keep your steam cleaner in tip-top shape with regular maintenance.
With proper technique and a few safety precautions, you'll be steam cleaning like a pro—and your tiles will thank you!
General Considerations for Use
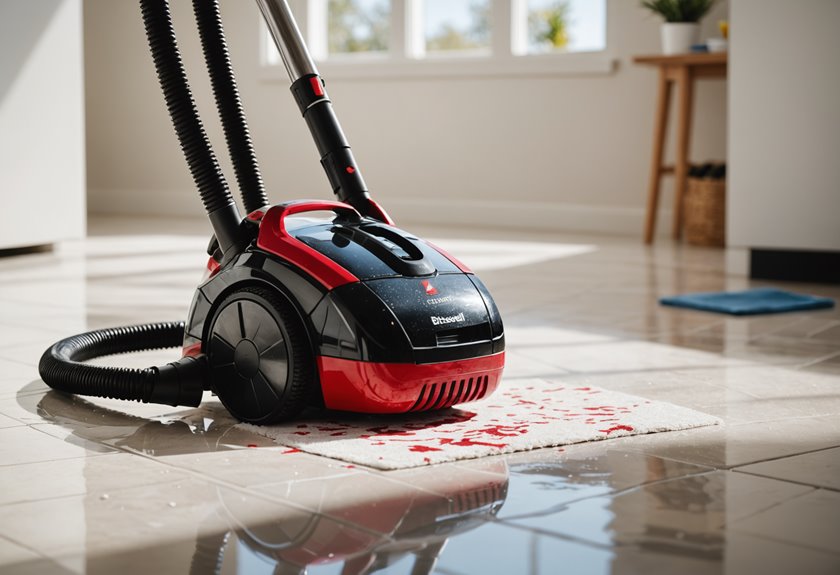
Considering the specific needs of your tile floors is essential before using a Bissell carpet cleaner. Not all models are created equal; some, like the Bissell CrossWave, are designed for multi-surface cleaning, while traditional carpet cleaners might treat your tiles like they're the tough kid on the block—rough and ready to break things!
Make certain you're using cleaning solutions specifically formulated for tile floors, or risk turning your beautiful tiles into a slippery disaster zone. Pre-treat those stubborn stains; trust me, your floor will thank you later.
When choosing your model, look for attachments specifically made for tile—these will save your tiles from scratches. Avoid models with metal parts, as they could turn your floor into a scratchy mess.
Before you plunge in, remove furniture and sweep the floor; you don't want dust bunnies showing up at the party!
Follow the cleaner's manual for specific instructions, and start from one end of the room to guarantee you don't miss a spot. Remember, using the right tools keeps your tiles looking fabulous and ready for whatever spills life throws your way!
Maintenance Tips for Your Cleaner
To keep your Bissell cleaner in top shape, establish a regular cleaning schedule to prevent buildup and maintain efficiency.
Make it a habit to inspect for wear on key components, ensuring everything functions properly.
Additionally, use proper storage techniques to protect the machine from damage and extend its lifespan.
Regular Cleaning Schedule
Establishing a regular cleaning schedule for your Bissell carpet cleaner not only enhances its performance but also prolongs its lifespan. Think of it like brushing your teeth—neglect it, and you'll regret it later!
Start by sweeping or vacuuming your tile floors to remove loose debris. Trust me, your cleaner will thank you for it. Move any furniture or rugs out of the way so you can get down to business without dodging obstacles.
Before you get started, pre-treat those stubborn stains and let the magic happen for a few minutes. Fill the water tank with warm water and add the recommended cleaning solution made just for tile floors. If your cleaner has a hard floor setting, be sure to use it!
When cleaning, work in sections, overlapping your strokes to guarantee every inch gets the love it deserves. Don't forget to empty the dirty water tank regularly—nothing's worse than a cleaner that's too full to function!
Inspect for Wear
After setting a solid cleaning routine, it's time to focus on keeping your Bissell carpet cleaner in top shape. Regular inspections can save you from potential disasters—like that time your cleaner decided it was taking a vacation mid-scrub!
Start with a visual inspection. Check the brush roll for wear and debris; a clean brush is a happy brush!
Next, assess the suction power. If it's slacking, you might've clogged filters or worn components. Don't forget to inspect hoses and seals for cracks—leaks are about as helpful as a chocolate teapot.
Look for blockages in intake ports, and examine wheels and casters for wear. They should glide like a dancer, not stumble like your uncle at a wedding!
For mechanical checks, clean or replace filters regularly and inspect belts and gears for damage.
Check electrical components for frayed wires, and make sure everything's securely attached—no one wants a rogue part flying around during use.
Proper Storage Techniques
When you've finished cleaning your floors, proper storage of your Bissell carpet cleaner is essential to secure its longevity and performance.
First, find a dry, cool spot away from direct sunlight—because your cleaner doesn't need a tan! Make sure it's out of reach of kids and pets; you don't want your furry friends thinking it's a new toy.
Elevate it off the floor to avoid any water damage; it's not a fish!
After each use, empty the dirty water tank to keep bacteria at bay. Don't forget to clean the brush roll and wipe down the exterior with a damp cloth. A little TLC goes a long way in preventing rust and mold, which is something you definitely don't want growing in your home.
For long-term storage, descale the cleaner to avoid mineral buildup, and make certain all parts are dry.
Organize the power cord and accessories neatly—no one likes a tangled mess! Consider using the original packaging or a protective case to keep it safe.
Regularly check on your cleaner during storage; give it a little pep talk if necessary. After all, it deserves some love!
Recommended Cleaning Solutions

Achieving a spotless and gleaming tile floor requires the right cleaning solutions tailored for effective performance. You'll want to grab the Bissell Multi-Surface Floor Cleaning Formula (32 oz.), specifically designed for sealed hard floors and area rugs. This pet-friendly powerhouse tackles tough messes while keeping your tiles safe from damage.
Remember, using the wrong cleaner can turn your floor into a sticky disaster—yikes!
If you're a pet owner, consider the CrossWave Pet Pro Oxy Multi-Surface Formula. It's great for those pesky pet tracks and leaves your floors looking fabulous.
And if you're feeling festive, check out the limited edition formulas like Woodland Pine and Spiced Apple—who says cleaning can't smell delightful?
Always opt for biodegradable detergents—no heavy metals or dyes here. Your floors deserve a gentle touch!
Before diving in, always test a small area to verify compatibility, and read the manufacturer's instructions like they're the latest gossip.
With the right solution, you'll not only clean your tiles but also make them shine like they just walked off a magazine cover!
Happy cleaning!
When to Seek Professional Help
Even with the right cleaning solutions, there are times when tackling tile floors requires more than just a DIY approach.
If you find yourself staring at complex stains that seem to have taken up permanent residence in your grout lines, it might be time to call in the pros. Similarly, if your tiles look like they've been through a war zone, visible damage or persistent dirt might necessitate expert repair and cleaning.
Got a massive area of tile that resembles the Great Plains? Professional cleaners can handle that with efficiency that'll make your head spin.
Plus, if your homemade solutions are failing faster than your New Year's resolutions, it's a clear sign to seek help.
Don't forget about safety! If you spot mold or slippery hazards that make your floors resemble an ice rink, it's best to let the experts handle it.
Ultimately, professional cleaning isn't just about aesthetics—it can extend the life of your tiles and keep your home healthy.
Conclusion
To sum up, using your Bissell carpet cleaner on tile floors can be effective if you follow the right steps. Make sure your model is suitable for hard surfaces, prepare your area, and prioritize safety. By employing an effective cleaning procedure and maintaining your cleaner regularly, you'll achieve great results. Always choose recommended cleaning solutions and know when it's time to call in professionals. With these tips, your tile floors will stay clean and gleaming!